We are accustomed to teaching with a model in front of a child, but these instructions should make it so that anyone can build one without our presence. We urge that parents and teachers be there to guide – but to allow the child to try to let the materials (and a picture of the final product) guide them. A wrong direction is always un-doable until you've glued something.
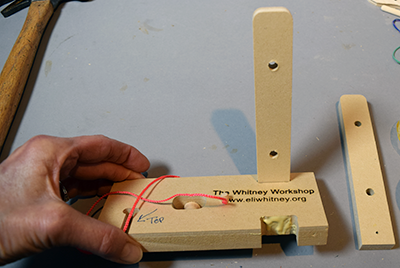
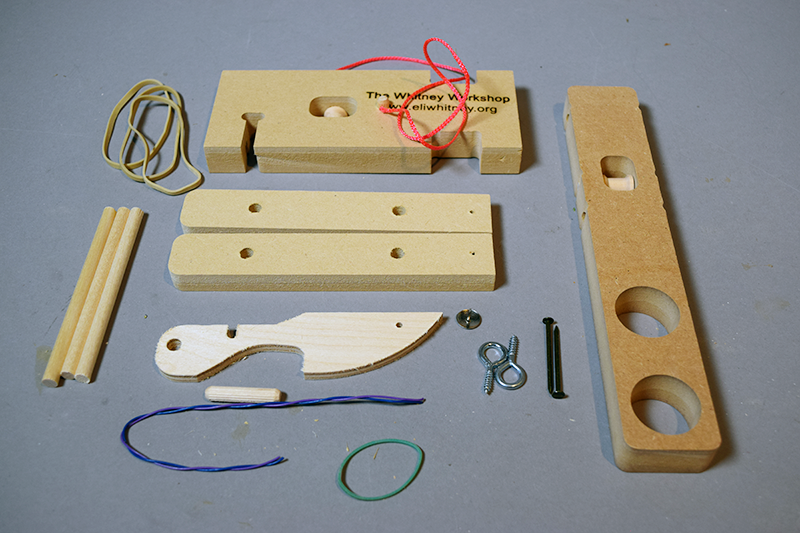
The Parts. We use Wood Glue but White glue is fine too.
Step 1. Making sure you have determined the top and bottom side of the base. Apply glue into the notches for the uprights and tap them into them so that they stand flat on the table when inserted into the notches. It should look like the second picture here.

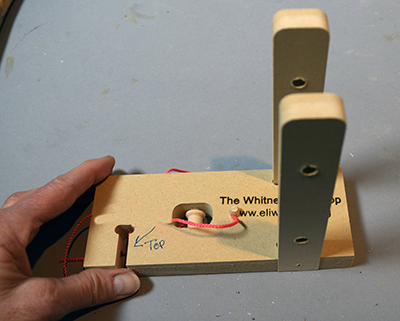
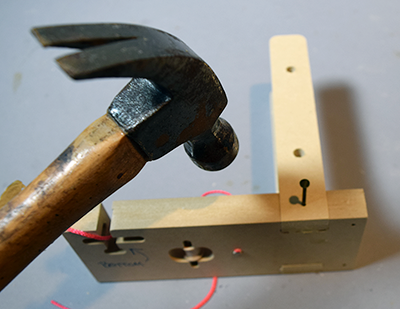
Step 2. Hammer the nails into the small holes in the bottoms of the uprights so that they are secure.

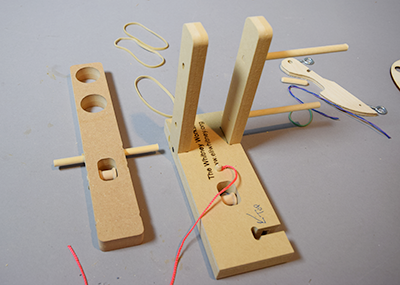
Step 3. Place two 1/4" dowels into one of the uprights as shown and the third dowel through the topmost hole in the 'arm' of the catapult.

Step 4. Attach the 'arm' to the uprights by pushing the dowel through the bottom hole on the arm. Make sure the 'arm' is going in the right direction when you attach it. Look at the picture. Push the top dowel through the hole on the top of the other upright.
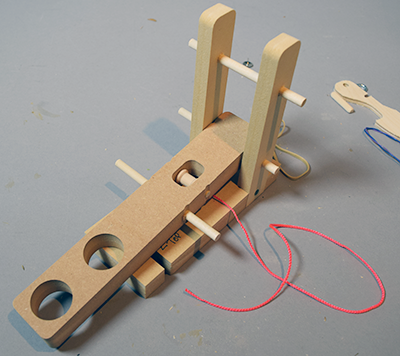
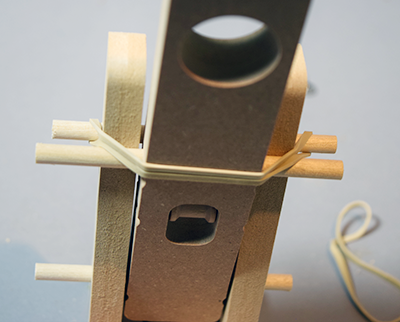
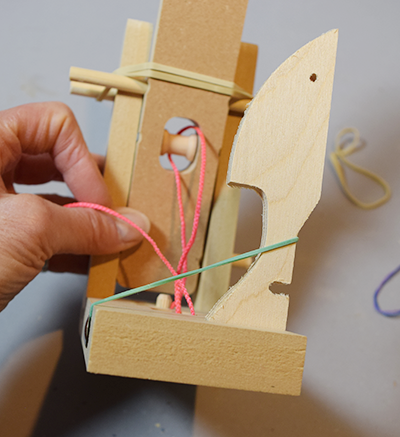
Step 5. Attach one of the tan rubberbands to the dowel on the topf of the uprights and bring it around the arm and onto the other side. (See the picture).

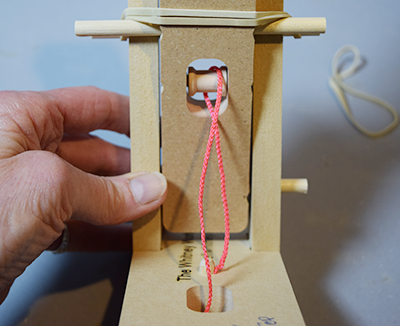
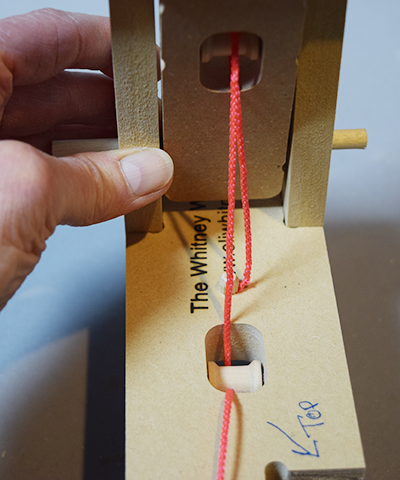
Step 6. Bring the string up and around the pulley in the arm. (See the picture).

Step 7. Then down, around and up around the pulley in the base. (See the picture).
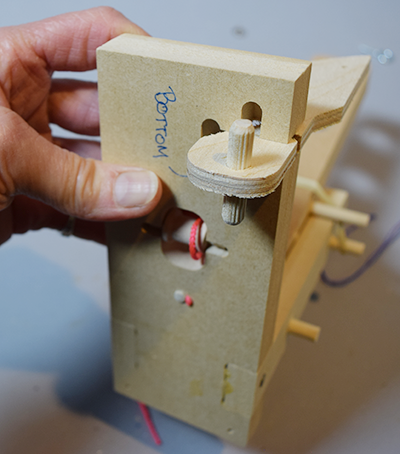
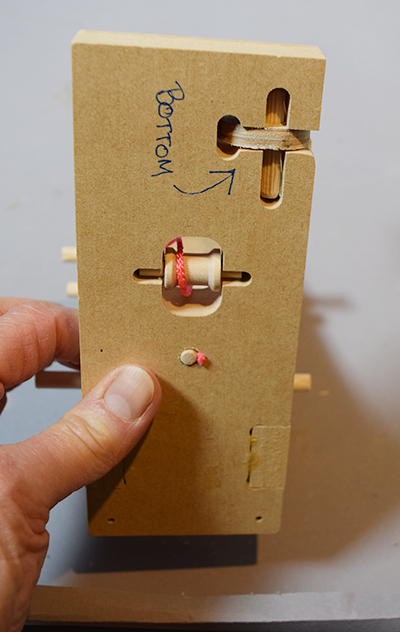
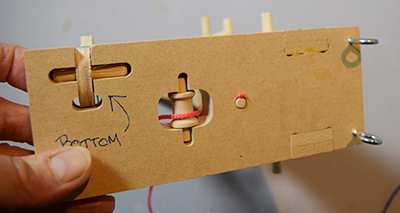
Step 8. Put the short dowel through the hole on the trigger piece and slide it into the bottom of the base so that it can be pushed down into the slot to secure it. (See the pictures).


Step 9. On the top side, take the small rubberband and attach it to the trigger and thumbtack it to the side of the base. (See the pictures).
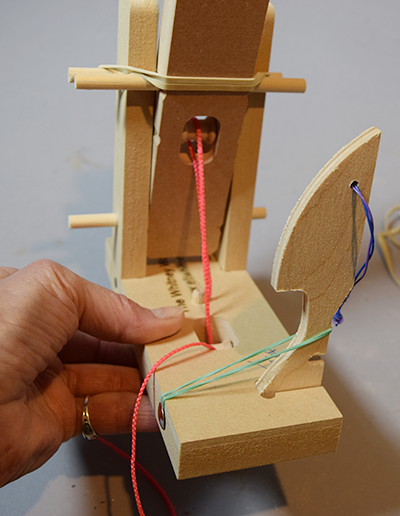
Step 10. Push in and twist the screw eyes to the small holes on the front bottom of the catapult. (See the pictures). These help you set the trajectory of your ping pong ball when it's launched.
Step 11. Attach the wire to the trigger. (See the pictures).

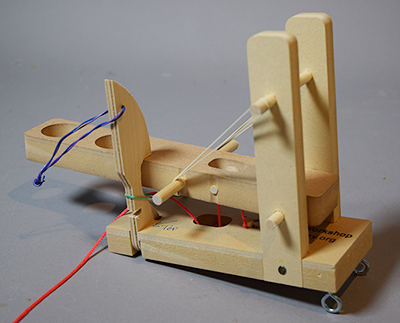
Step 12. Completed Simple Machine Catapult ready to launch a ping pong ball. (See the picture.)

You should wear eye protection whenever using a catapult. Be sure to shoot away from yourself, and don't put your face above the catapult when shooting it.