Project Ideas, Taken from The New England Indians by C. Keith Wilbur.
Villages
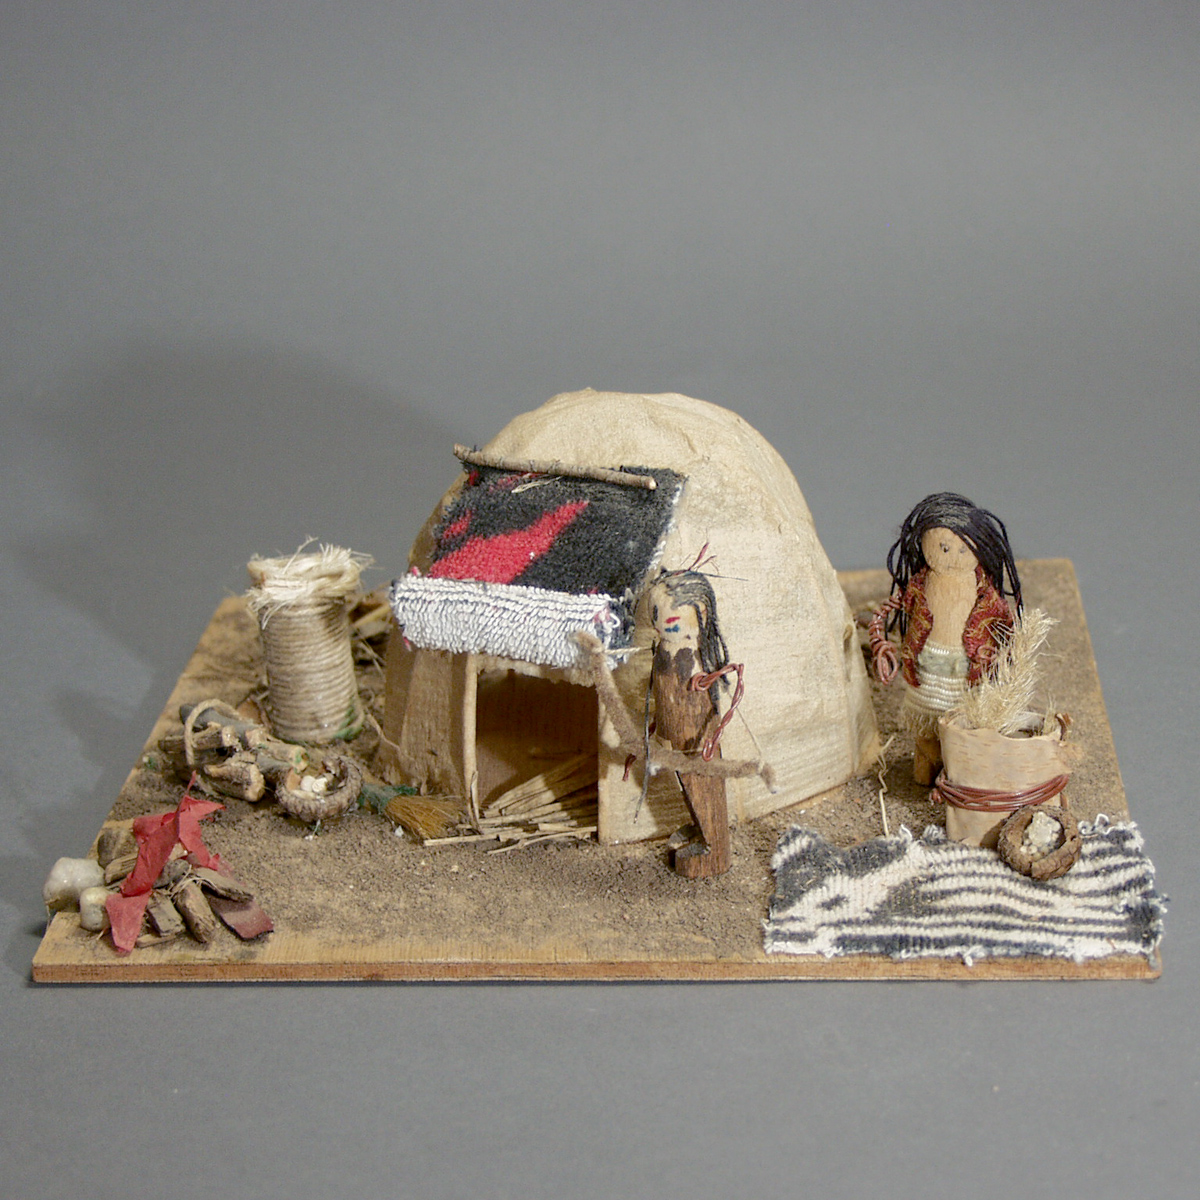
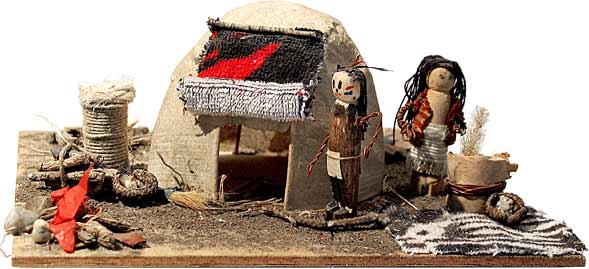
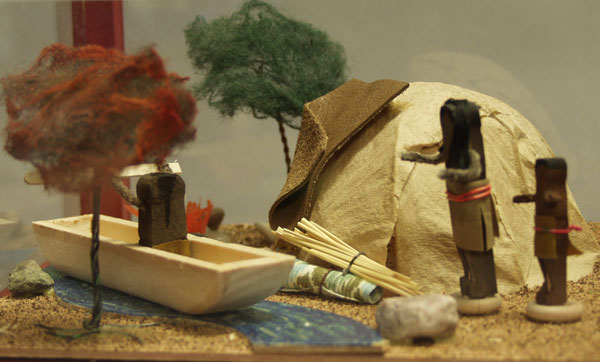
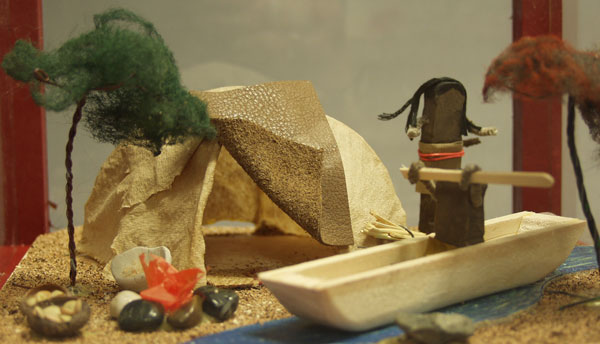
Shelter
Hairstyles
Headdresses
Breech Clouts
Pots
Stone Bowls
Mortars and Pestles
Pipes
Dugout Canoes
Bow and Arrow
Games
Villages
Return to top
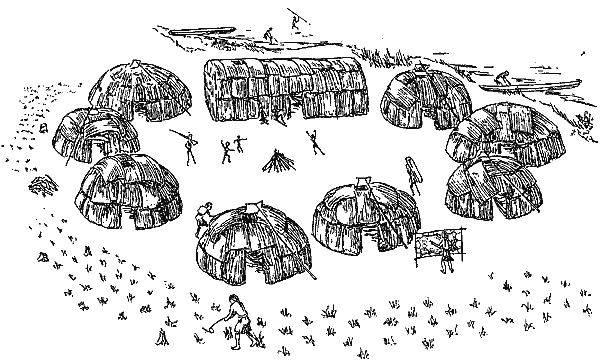
Location of a village all depended on game, fertile fields, and the availability of firewood. Sites were by ponds, rivers, or ocean. During the winter months some would move to large hills as protection from the wind. It would take a few hours to break their villages down and pack up. The average village had about one hundred people. The women worked in the gardens that surrounded their villages.
Shelter
Return to top
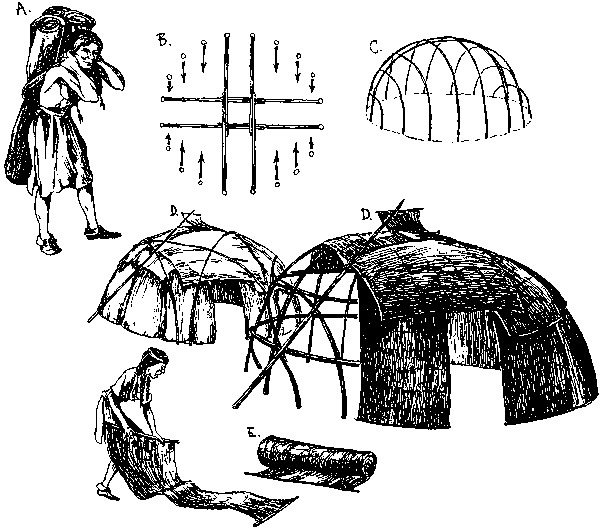
- The covering to their wigwams were the only thing that needed to be saved when they moved during the seasons, and they could easily be packed up (A.).
- The husband would mark out a circle in the ground about 10 to 16 feet in diameter. (B).
- The highest point in the middle was 6 to 8 feet high. (C.).
- An 18 in. hole was left at the top of the roof for smoke to escape. (D.)
- The entrances were covered with mats, deerskin, or bark to block the wind. (E.)
Suggested materials: flexible wood, brown paper towels, and paper mache mix.
Steps
- Place wood in corresponding holes on board.
- Cut up small strips of brown paper towels.
- Place paper towel in paper miche mix and carefully get rid of excess glue.
- Lay paper towels on top of structure starting at bottom, moving up.
Tip: Make sure that you decide where door is before placing paper towels down.
Ground Covering
Suggested materials: a mixture of sawdust, dirt and sand.
Steps
- Cover open space on board with glue. (Make sure you blend the glue in)
- Distribute materials over glue and gently tap the extra sawdust off.
Door Covering
Suggested materials: fabric, glue.
Steps
- Cut fabric to size of door.
- glue top edge of fabric and glue to top of door on wigwam.
- Fold up right bottom corner and place a dab of glue on outside and stick to fabric on left side. Or roll fabric up and glue to itself.
Hair Styles
Return to top
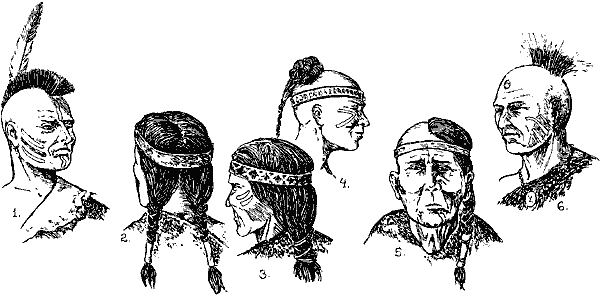
- The most popular hairstyle was the cockscomb, which was a strip of hair running down the center of the head. It was kept short and stiff with paints and grease. The sides of the head were shaved. Often deer bristles were dyed red and tied to the head to heighten the effect.
- Those that had longer hair would braid it. Or leave it hanging down their back. Bits of shells, stones, metal and the like were often tied into the hair for decoration.
- Some would tie their hair in a top knot and let some hair hang down like a horse's tail.
- Others shaved their head on one side and let the hair grow on the other.
- Some would shave all of their hair but a small tuft on top of their head.
Suggested materials: pipe cleaners or colored string.
Steps
- Glue hair where desired.
- color hair as desired.
Tips: Use the pipe cleaners for the small tufts on top of head, and use string for longer hair.
Headdresses
Return to top
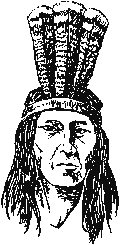
Both men and women wore headbands of embroidered skin. White feathered bird skins, a fox tail or rattlesnake skins were often worn as headbands. They hung bangles and fancy tails from the headband. Feathers from an eagle, hawk or turkey were secured to the band and stuck straight upright. There is evidence that only the most outstanding warriors wore eagle tail feathers, each representing an enemy life taken in battle.
Suggested materials: pipe cleaners, string, and feathers.
Steps
- Take pipe cleaners or feathers and decorate as desired.
- Glue feathers to headband.
- Glue headband to head.
Breech Clouts
Return to top
It was suspended from a belt. (A).
Flaps hung in the front and the back. (B).
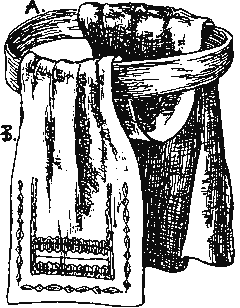
Boys until the age of ten or twelve wore nothing in the warm weather. Both men and women wore breech clouts made out of doe or seal skin.
Suggested materials: fabric, thin wire or string, glue.
Steps
- cut fabric to desired size for piece in front and piece on back.
- glue down fabric to front and back.
- Wrap string or thin wire around waist.
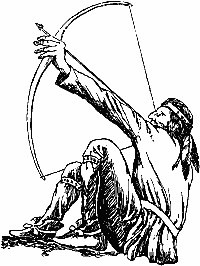
Bow and Arrow
>Return to top
New England Indian bows were long bows- 5 to 6 ft. Most of them were made out of Ash, Oak, Witch Hazel, and Hickory.
Suggested materials: flexible wood, rubber band
Steps
- Bend wood into a half moon shape (A.).
- Tie rubber band from one end of wood to the other.
Tips: You can substitute the wood for pipe cleaners.
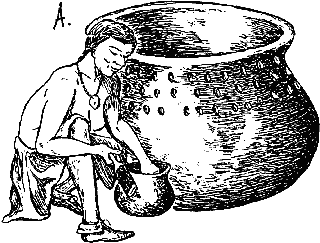
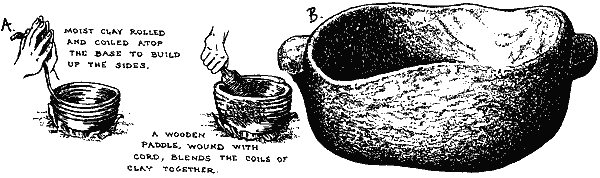
Pots
Return to top
Women made the pots that were used for cooking and storing food (A.).
Algonquin pots were simply decorated.
Suggested materials: clay, acorns.
Steps
- Pick acorn that is desired size for pot.
- Form clay around acorn.
Tips: If you want a handle for the pot use thin wire, and attach to sides. To make coil pots roll out long coils of clay and place them on top of each other (A.) Pinch pots are also good examples of stone bowls. (B).
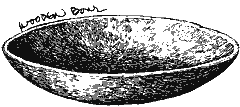
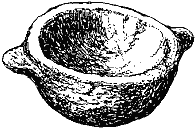
Stone Bowls
Return to top
Drinking cups, spoons, platters, plates, dishes, and storage bowls were all made out of stoneware.
Men were craftsmen in villages.
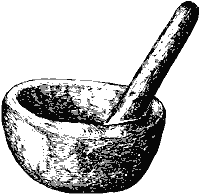
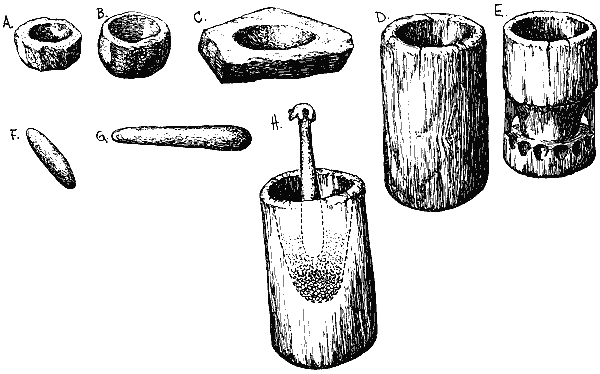
Mortars and Pestles
Return to top
There were many different types of mortars.
(A.) Steatite Mortar
(B.) Geode
(C.) Shallow Stone
(D.) Log Mortar
(E.) Carved Mohican Mortar
(F.) Glacial Cobble Pestle
(G.) Wooden Pestle
(H.) Because the cavity of the mortar was funnel- shaped, uncrushed kernels gravitated to the center to receive the full force of the pestle. Smaller particles rose to the top of the mortar. Walnuts were extracted of their oil; acorns were ground into meal for the winter storage. Roots, seeds, berries, and bone marrow could be ground up and used to strengthen the stews.
Suggested materials: clay, acorns, and small sticks.
Steps
- Form clay around acorn.
- Take small stick relevant to mortar and cover with clay.
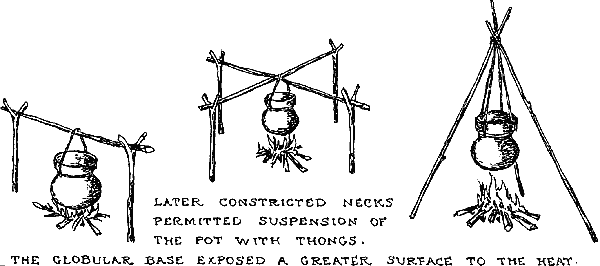
Pot Holder for cooking over fire
Suggested materials: 2 sticks with V shape at one end, 1 straight stick, clay, glue.
Steps
- Take two sticks with V shapes at one end and stick them in clay in order to stay up.
- Lay stick across two vertical pieces.
Fire
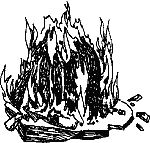
Suggested materials: sticks, glue, red and yellow tissue paper.
Steps
- Glue sticks down.
- Glue little pieces of red and yellow tissue paper sticking up from sticks.
Pipes
Return to top
Women crafted the clay pipes and the men smoked out of them. Men considered it a privilege to grow tobacco.
(A.) Between 1000 A.D. and 1650 A.D. three pipes were developed.
(B.) The Straight Pipe
(C.) The Elbow Pipe
(D.) Elbow Trumpet

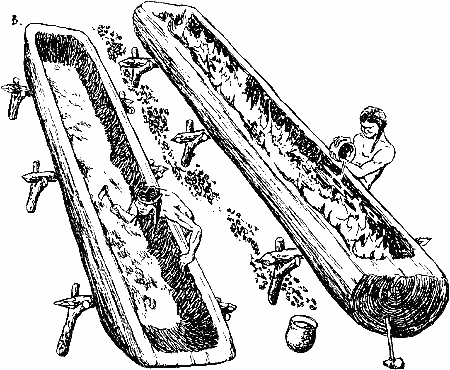
Dugout Canoes
Return to top
White pine trees were used to build the canoes. (A.) Limbs were burned off and the bark was stripped free. The log was raised on supports and gradually burned, chipped and scraped into shape. A paddle was made out of maple with a 20 in. blade and a 3 ft. handle.
Suggested materials: clay.
Steps
- Use a big chunk of clay and get it into a rectangular shape.
- Hollow out center of clay.
Games
Return to top
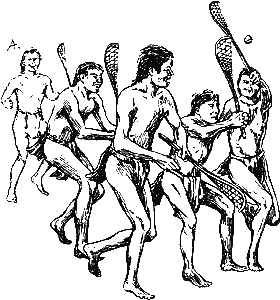
The center field of the village provided the playing field for stickball, stone throwing, running matches, weight lifting, wrestling, spirited dancing, and marksmanship.
Many spectators came to watch these events and cheer the players on.
Modern day lacrosse was played.
All men over the age of sixteen were able to take place in war dances.
Lacrosse Sticks
>Return to top
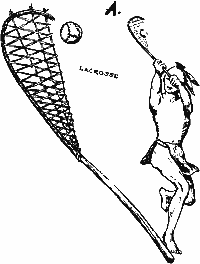
Suggested materials: window screen, pipe cleaners.
Steps
- Shape pipe cleaner into frame of stick.
- Cut out window screen to fit in hole as net.
- Color pipe cleaner brown.