
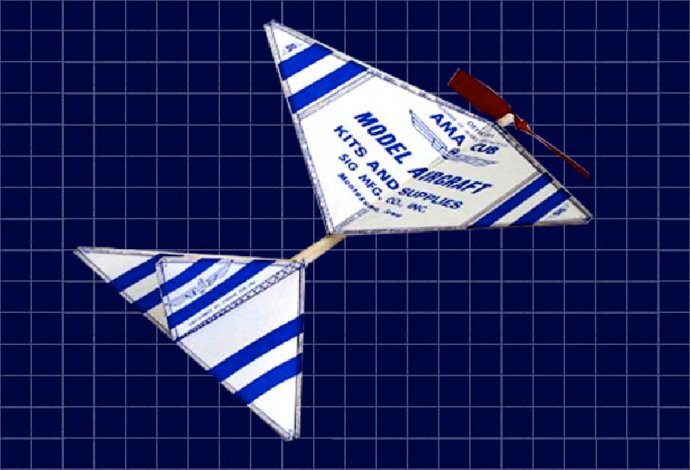
The AMA Cub's classic design is accessible to beginners and engaging to advanced builders.
|
|
1. Glue: Wood glue should be used. "Tite Bond ll" is the best we have found. It is strong and dries dramatically quicker. Tape is needed as well - masking tape is perferrable. You need these: blade, glue, pins...
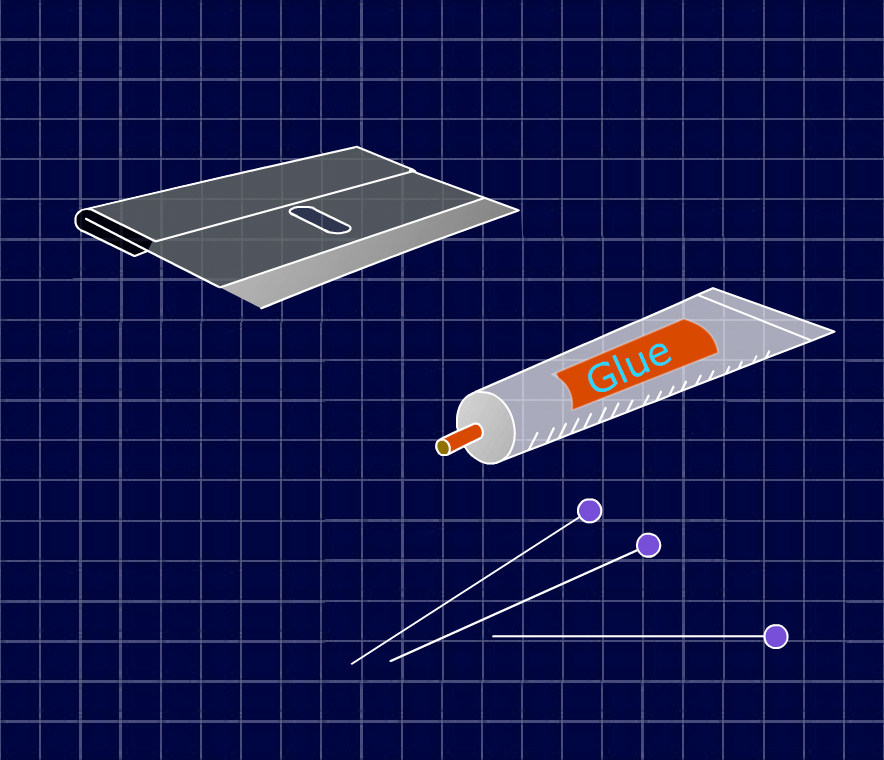
2. ...and a flat board, bigger than the plan, that you can stick pins into easily.
3. Put the plan on the board, upside down! You can see through the back of the plan.
4. Tape the plan to the board.
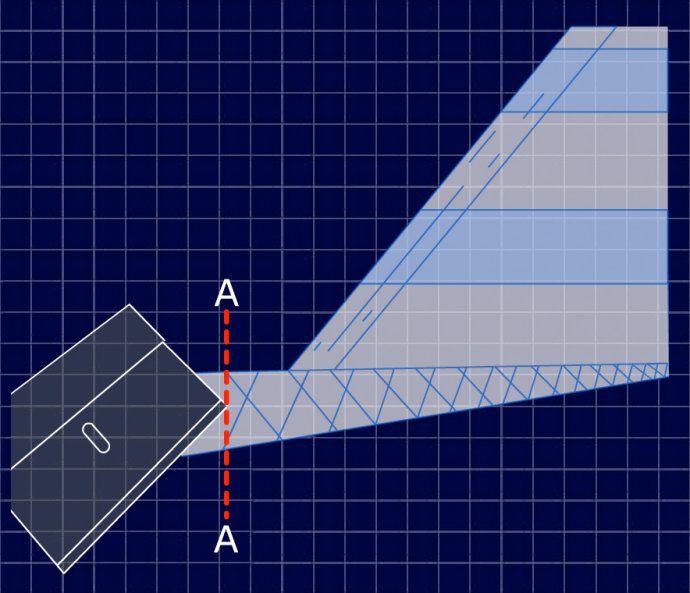
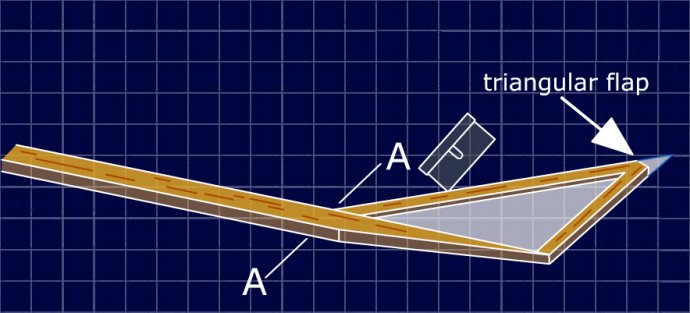
5. Be sure to cut the plan only. Some people have made the mistake of cutting the balsa motor stick. Cut the plan along line form A to A.
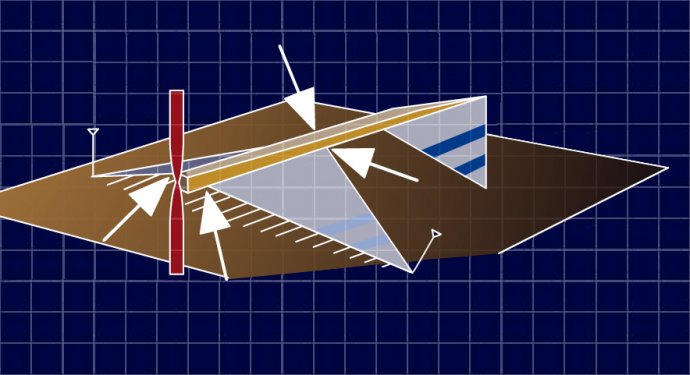
6. Be Careful! Gluing the motor stick on upside down is the single most common mistake. The result is a plane that won't fly. A wedge is cut from the bottom of the motor stick. The stabilizer is attached there and this angle (decologe) is critical for flight. Glue motor stick to Plan but only where you see XXXXX.
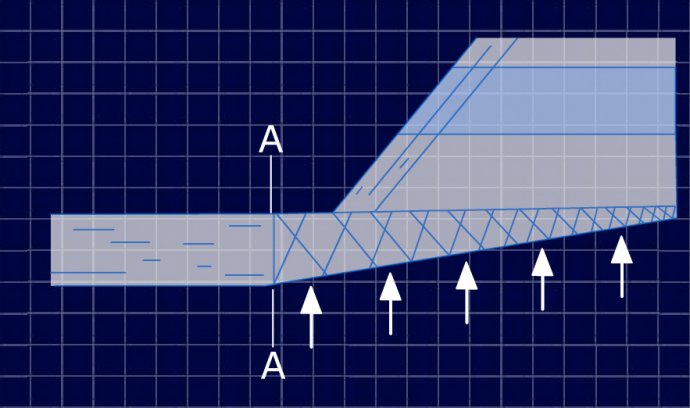
7. Cutting the angle (a bevel) on the balsa stick to match with the motor stick is difficult. Seeing angles is a learned skill. There should be no gap between the balsa parts. In a good joint wood is in contact with wood. Less glue is used in creating a strong joint.
Use less glue for:
Cut this wood strips to fit rudder outline.
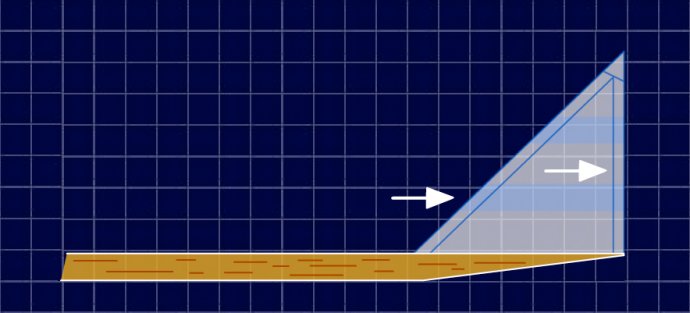
8. Glue strips to plan and also between where wood pieces touch each other.
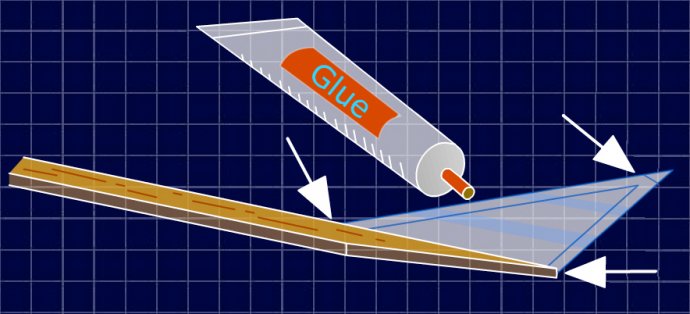
9. Cut the paper carefully - right against the wood. Don't cut off the triangular flap. Cut paper around rudder, along edges of wood from A to A. Leave paper & paste arrow.
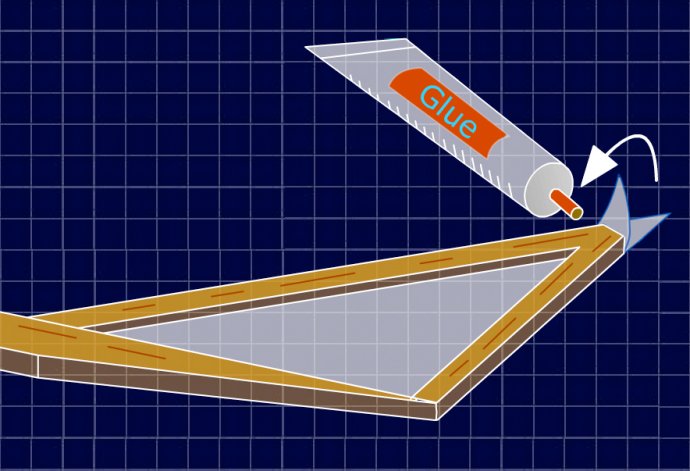
10. Put glue on paper tip and fold over onto wood.
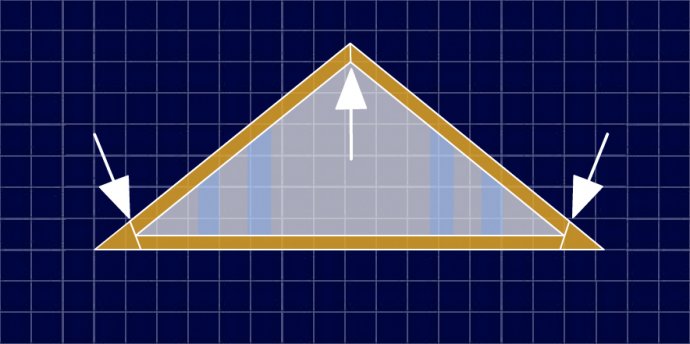
11. Make the wing the same way you made rudder, with glue between wood pieces at arrows.
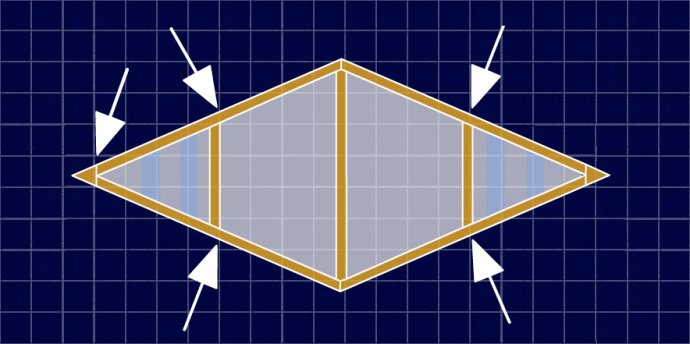
12. Make the wing the same way you made rudder. with glue between woof pieces at arrows.
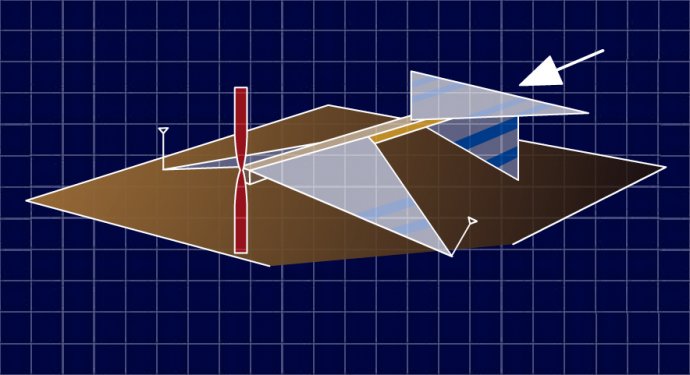
13. Cut the wing and the tail from the plan.
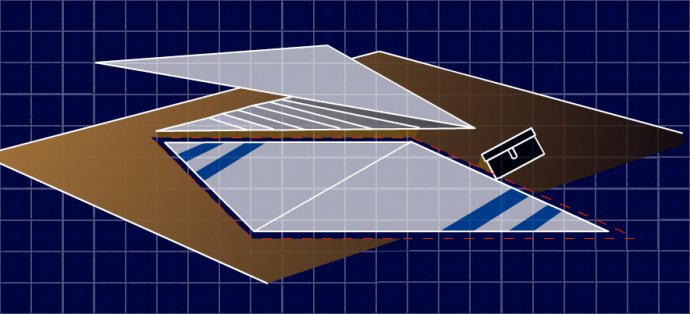
14. Mark the motor stick at the back of the propeller assembly. Then take the propeller assembly off. It is easier to attach the wing to the motor stick without the propeller assembly. The mask is to tell you how far forward you can put the wing.
15. The best planes seems to have the wing close to the propeller assembly. Putting the front of the wing between 5mm and 10mm in back of your line is best. Putting the pins is at an angle will help to keep the wing attached while the glue dries. Glue and pin the wing onto the motor stick, then go right to the next step.
16. Taping the wing tips down works much better than putting them. You may want to tape the rudder to keep it straight and perpendicular to the board. Turn model over. Hold in plane on building board and bend wings down.
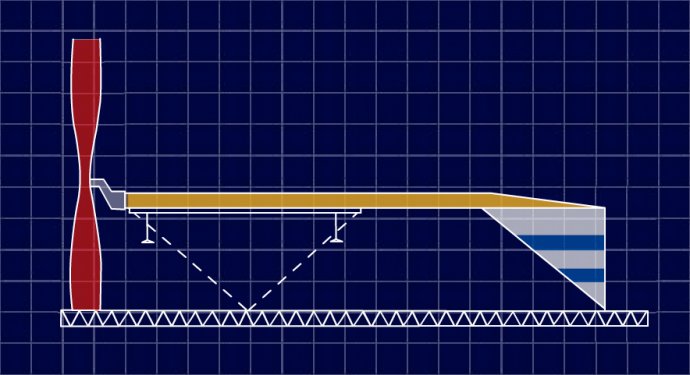
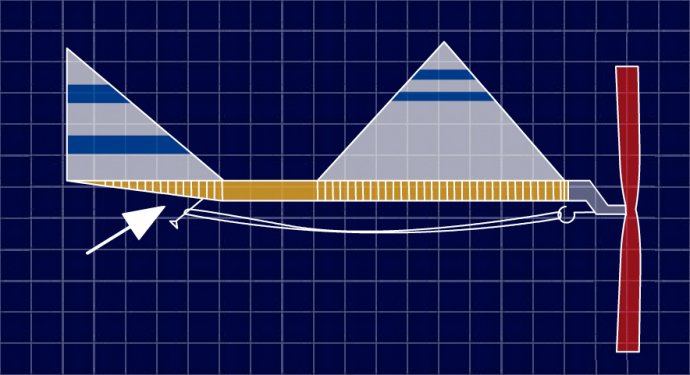
17. Pin on board so that only prop, rubber, and wing tips touch board. Add glue arrows.
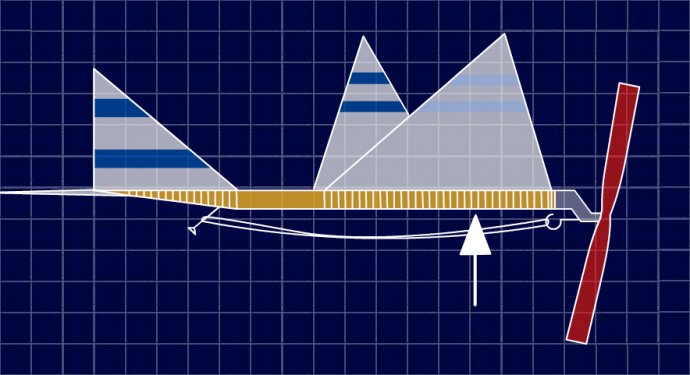
18. You may need tape between the tail and the board to hold it on straight while the glue is drying. Glue the tail to angle part of the motor stick.
19. "Let model dry for one hour." Dream on! One hour is never enough unless the joints are perfect, only a minimum amount of glue is used and the air in very dry. Over night drying works best.

20. Take model off board. Remove all pins, except push one pin in as shown.
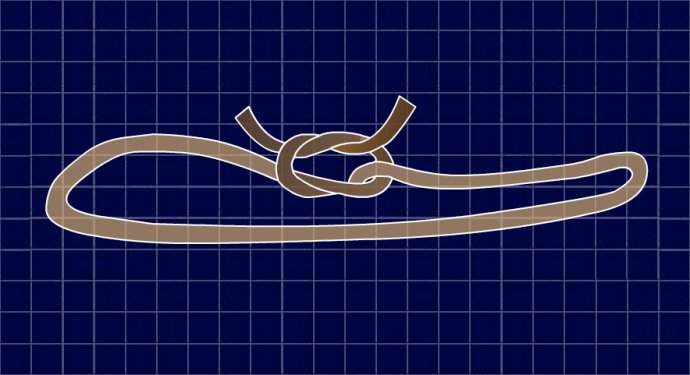
21. A loop about 50mm longer than the plane seems to work best. Much experimentation is needed. Two overhand knots (one behind the other) is the preferred way to tie the rubber. If you don't have a ready-to-use rubber band, make a knot in rubber strip as you see here.
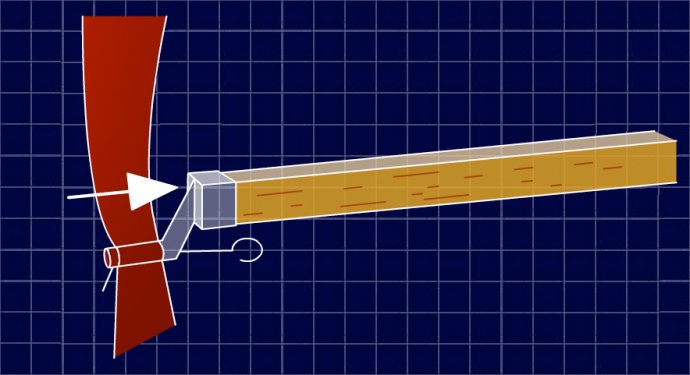
22. Hang the rubber band motor between the propeller hook and to the pin near the tail.

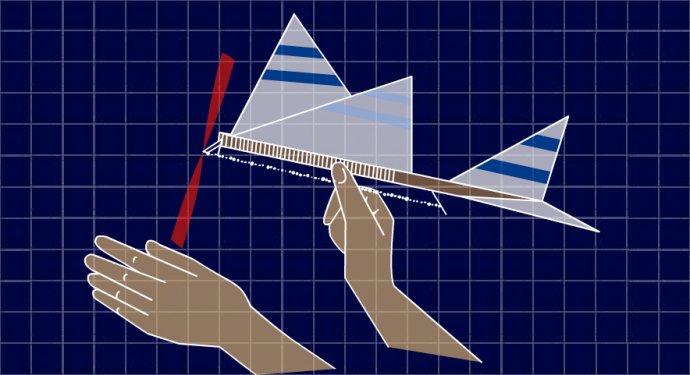
23. Prepare for winding motor by holding motor stock with two fingers of left hand, under wing.
24. Wind motor as shown, with right hand (opposite if left handed). Start with 100 turns.
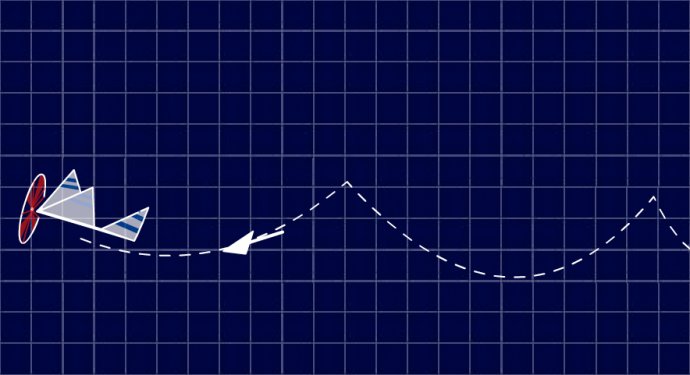
25. Launch model with very gentle push, nose slightly up, as you see here, let prop go before letting motor stick go.
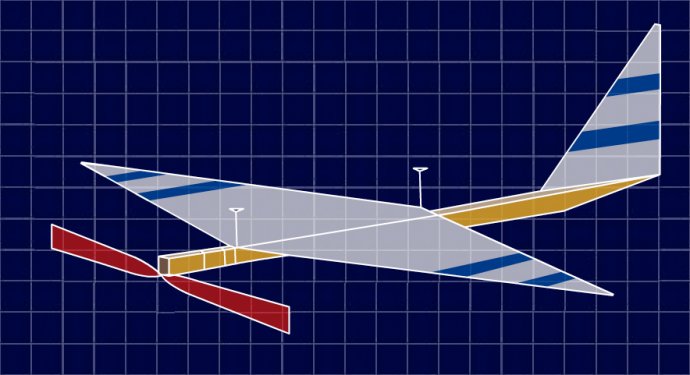
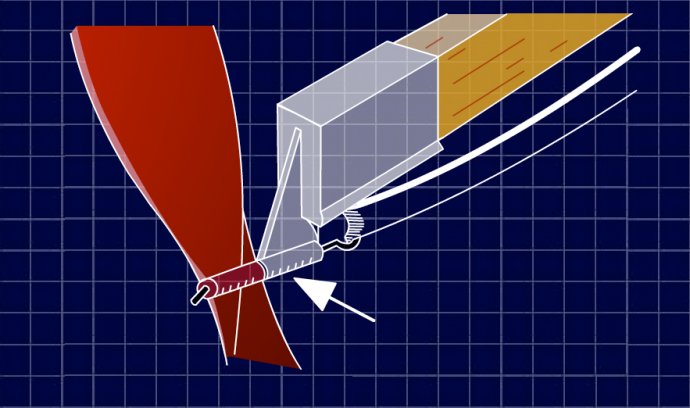
26. A model is said to "stall" when it flies up-down, up-down. The power is wasted and the model does not climb as it should. To correct this, see 27.
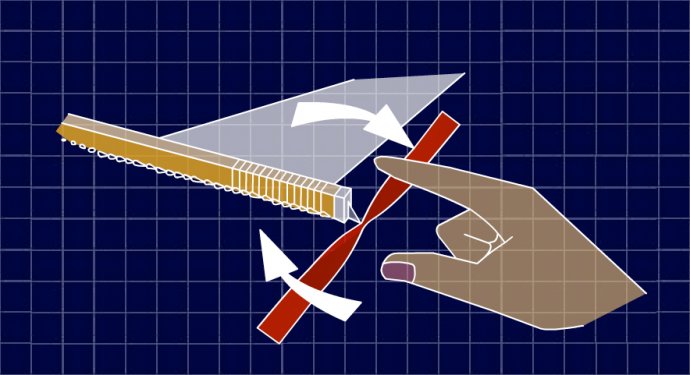
27. Twist the thin part of the propeller assemble, so that the prop pulls at an angle, as shown, more, if needed, to correct the "stall".
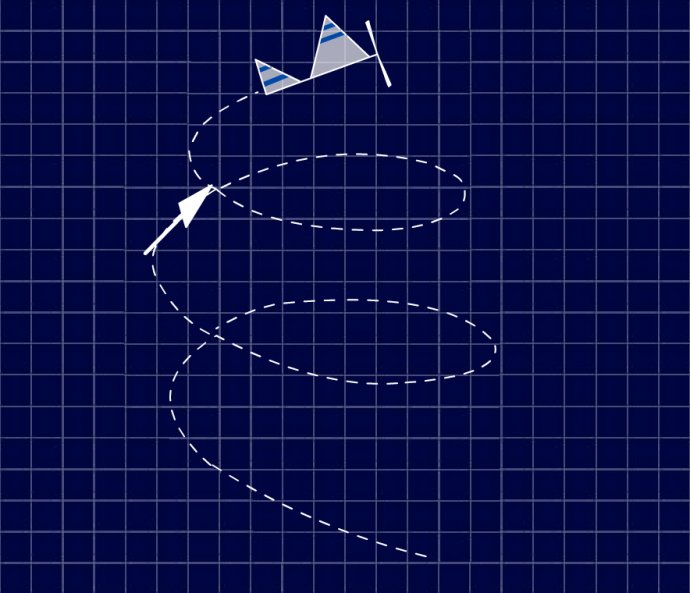
28. If you have the propeller adjusted right, your model should fly like this... in a climbing turn. Try winding more turns for longer flights.
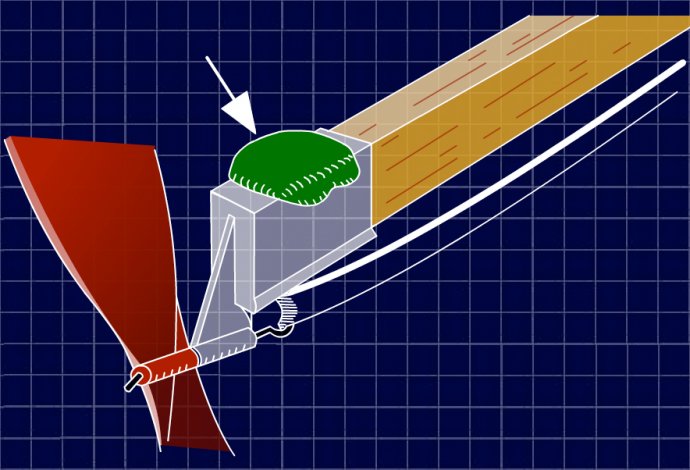
29. If your model glides in "stalls," add a small bit of clay to the nose as sow by the arrow.
30. Happy Flying!

Unless otherwise noted, content on this site is licensed under a Creative Commons Attribution-Noncommercial-Share Alike 3.0 License.
During the summer, we teach summer camp classes during the day here in the Museum.
Monday – Friday, Office Hours 9am – 5pm
Walk-in Projects available during open hours on
Saturday and Sunday.
Saturday: 10am – 3pm
Sunday: 10am – 3pm
Phone: (203) 777-1833
Fax: (203) 777-1229
